


Bring history to life with a free paper mache recipe and patterns! You can become an Egyptian Pharaoh or a Roman soldier or have some fun making paper mache animals.
It’s a great use for all those cardboard boxes lying around. Add a little paint, and the options are endless!
Paper mache also helps develop manual dexterity and spatial skills.
Color blending fuels creativity, enhances the learning experience, develops observation skills, and even improves concentration.
I realized quickly my paper mache skills were rusty. But, I have to say, it’s pretty fun!
Free paper mache recipe and patterns for a variety of ages are below.
FREE Paper Mache Recipe & PATTERNS FOR THESE IDEAS:


general supplies

- Cardboard boxes
- Scissors (parental supervision may be required)
- Newspaper, brown paper bags, computer paper
- Depending on the creature – balloons, plastic pop bottles, buttons…look around and see what you have.

Paper mache paste (free paper mache recipe below, or you can buy some such as Elmer’s Paste, non-toxic, water cleanup ** UPDATE Elmers Paste is no longer available. You can google non-toxic paper-mache paste for options – we just make our own)

Paint: We used this non-toxic metallic paint for a fun option or regular non-toxic acrylic colors, especially for masks fit for kings and soldiers! Acrylic is best as it is thick for good coverage and dries fast.
Spray Paint: (Optional) You can also use spray paint for a base coat. If you do this, parents: spray it outdoors with a lot of airflow. Acrylic paint can be used on top of the spray paint.

Spheres: Balloons, crumpled paper, or even some styrofoam balls

Paintbrushes: Having a variety of tip sizes helps. A few smaller tip sizes and some larger ones for broader coverage and younger kids

Tape: masking tape (I found this held well) and duct tape (for heavier holds)
Glue Gun: You could use a mini glue gun like this Gorilla dual temp gun (parental supervision is recommended to avoid burns). There is one for “kids” that is a low-temperature, safer option. I haven’t used this, so I’m not sure how well the glue holds large cardboard together, but it has good reviews.
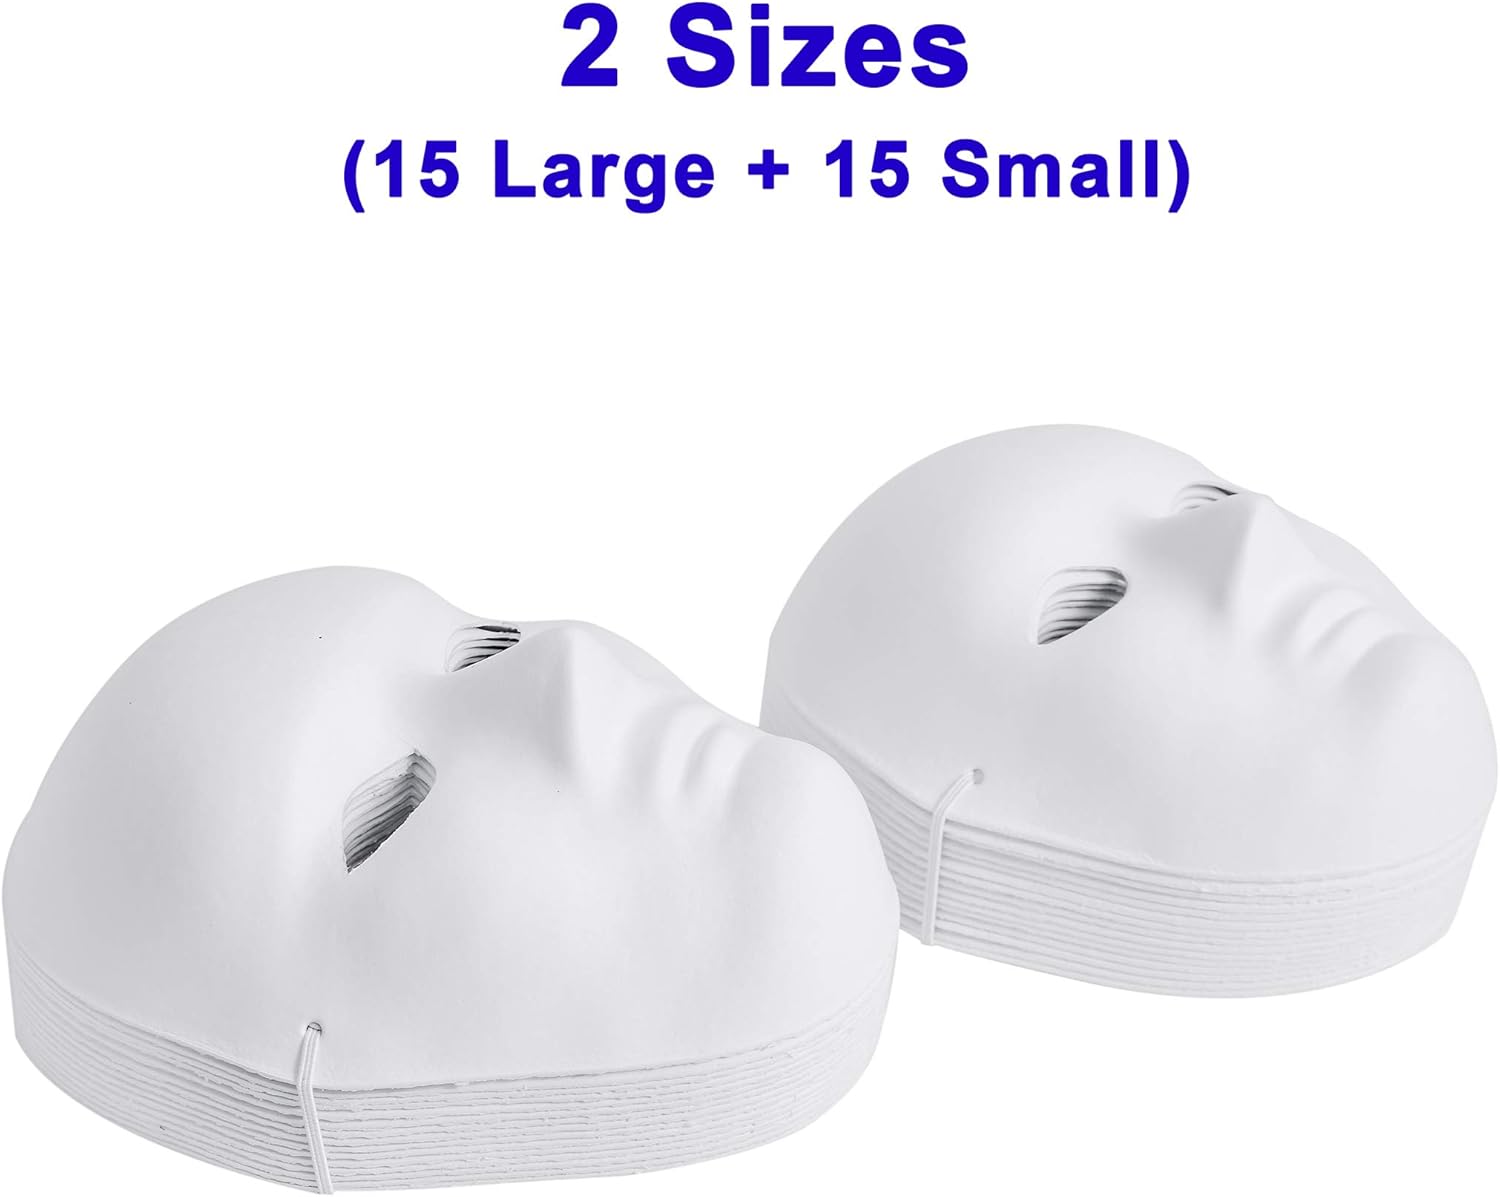
Mask: Plastic or paper face mask if you don’t want to use a human face. No pre-purchased mask is needed if using your own face, but be sure to use a layer of Vaseline if using actual skin, or the paper will stick!
These in the photo are non-reusable paper masks but are designed for paper mache, have an elastic already attached, come in two sizes, and are perfect for numerous projects. I used a plastic one I got at a dollar store.

Optional: Waterproof paint aprons. This one fits ages 3-8, comes in a 2 or 4-pack, or this one offers larger sizes and is longer.
general tips
- White computer paper as a final layer gives a smoother finish and can be easier to paint
- For glue, a hot glue gun works well, but parental supervision is usually needed for young kids
- Some templates are provided, but we do encourage free drawing to help develop creativity and skills such as hand-eye coordination and spatial skills
- 2-3 layers of paper mache are recommended, but be sure not to go too thick, or it will take forever to dry
- Allow 24 hours for the paper mache to dry. You can speed it up with a hairdryer or put it in the sun
- If cardboard warps after drying, gently move it back into shape with your hands
- The instructions included are a guideline: change what you will and do your own thing!

Ages
Some are a little more complicated, some simpler.
You can also adjust the ideas: for example, the Roman shield can be simplified. Instead of making it curve, leave the cardboard straight, and you skip a few steps.
Just have fun!
Paper Mache Projects and Research
To make things a little more interesting, do a little research on accuracy.
For example, different Roman eras meant different materials were used: leather, brass, iron, and bronze. Also, different amour designs were used depending on the time and activity. Some shields had designs. Which hands did soldiers hold their shield and sword with and why? You can be creative or as historically accurate as you want.

Make a different style of shield.
Different lands, different ages – pick your favorite!
For the animals, where do they live? What do they eat? Paint them all the colors of the rainbow or paint them as they appear in nature.
 Print This Post
Patterns

Free Paper Mache Recipe

Face Mask


Roman Shield


Roman Belt


Elephant

Turtle

Polar Bear

Additional Ideas
Combine some masks with cookies and reenact some edible history!
See the article Teach History with Cookies

The Big Sis